To end a chunky blanket, pull the working yarn through the first two loops of the last row, then take each next loop through the loop on your hand until one loop is left. Keep the closing loops loose, two to three fingers wide (about 1.5 to 2 inches, 4 to 5 cm), or the top edge cinches and curls into a triangle. Pull the tail through the last loop and weave it into the braided edge. You never need a knot.
Quick answer. Leave about four blanket widths of yarn, close loop through loop, and weave the tail.
- Yarn for the row: width x 4 plus 12 inches of tail. That is 156 inches for a 36 inch blanket and 252 inches for a 60 inch one.
- Closing loops: two to three fingers wide, about 1.5 to 2 inches (4 to 5 cm). A safe margin is 3 inches (7 to 8 cm), three to four fingers.
- The end: tail through the last loop, then woven back and forth through the braided edge.
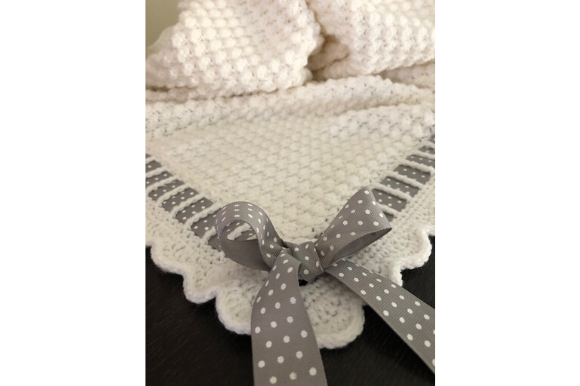
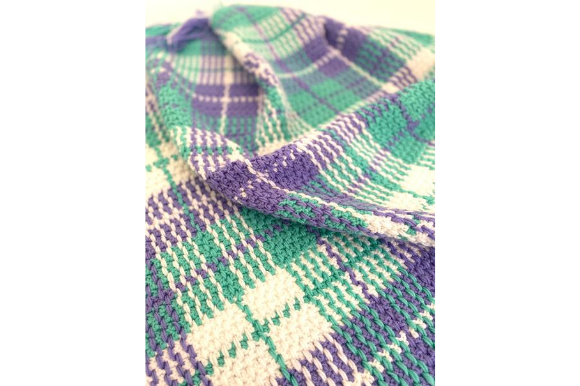
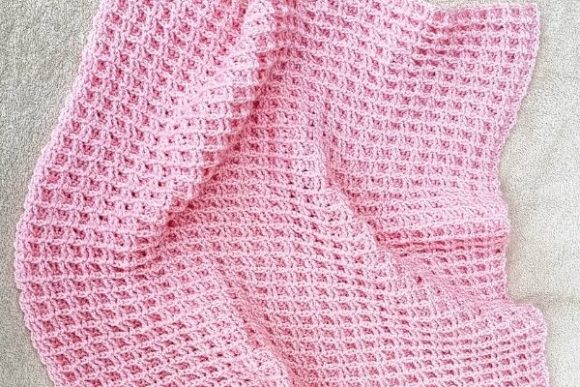
The four crochet patterns near the end of this guide, such as Sundae Snuggle Crochet Blanket Pattern, are here for one reason: a hook blanket is fastened off, so the loop closing below does not apply to it.
This loop-through-loop finish is for a blanket made by hand from thick yarn or giant loops. If you work with a hook, go to idea 11; if you work on needles, use the flat last row guide linked below.
Your fear of this last row is fair. You close it, the edge pulls in, and the blanket comes off your hands narrower than you planned.
The sections below give you the yarn, the loop count and the steps, so you can cast off a chunky blanket at the width you made.
How much yarn to leave for the last row: four widths plus a tail
The closing row eats about four times the width of the blanket.
Add 12 inches for the tail and you have the length to cut before you start. Run short and you have to join a new strand mid-row. A join in the middle of the row is acceptable (idea 8), but a join on a corner loop is the weak spot.
You will see “three or four widths” in most lessons. Here is the sum in inches, yards and metres.
| Blanket width | Yarn for the last row | In yards | In metres |
|---|---|---|---|
| 36 inches (91 cm) | 156 inches | 4.3 yards | 4.0 m |
| 48 inches (122 cm) | 204 inches | 5.7 yards | 5.2 m |
| 60 inches (152 cm) | 252 inches | 7.0 yards | 6.4 m |
How I measure it
- Stop before the last row. Do not start closing while the yarn ball is still feeding the work.
- Throw the yarn across the blanket. Lay it over the width four times, then add 12 inches.
The same sum sits behind every chunky yarn blanket ideas and the yardage math I plan, because the closing row is the last place a blanket asks for yarn you did not budget.
A hook blanket such as Double Waffle Crochet Baby Blanket skips the closing row, since you fasten it off.
Pro tip: If the yarn left on the ball is shorter than the table says, join a fresh ball without a knot, as in idea 8.
Loops across for your blanket width: a table for 36, 48 and 60 inches
With this close you cannot choose the number of closing loops: it equals the loops already in your last row. You control only how tall each closing loop is, so count the row first.
| Blanket width | Loops already in your last row (1.3 to 1.6 inches each) | What the closing loops must do |
|---|---|---|
| 36 inches | 23 to 28 | Each closing loop about 2 to 3 inches tall, never shorter than a working loop |
| 48 inches | 30 to 37 | Same height, so the edge keeps the full 48 inches |
| 60 inches | 38 to 46 | Same height, and check the first and last loop against each other |
Why the edge pulls in
A closing loop that is too short or too tight does: each one draws its two neighbours toward it as you pass the yarn through, and across 25 or 30 loops that adds up to a curled top.
- Loops that are too short or tight cost width. The edge pulls in and curls into a triangle.
- Loops that are too tall leave slack. The top then flares and ruffles.
I make my closing loops no shorter than the loops I worked in, with a little room to spare, and compare the finished edge with the row below. Mikeisha’s Baby Blanket states a printed size. The knit a chunky blanket with a flat last row guide does the same sum in stitches.
Pro tip: Count the loops of your foundation row, the cast-on, which the last row must match, and write the number on a scrap of paper.
1. Bind off a hand-knit chunky blanket one loop through the next
This is the base method, and the other ten build on it. Each loop is pulled through the next, so the top edge turns into a braid that matches the cast-on. You need no needle, no hook and no knot.
To cast off a chunky blanket, you pull the working yarn through the first two loops of the last row, then take each next loop through the loop on your hand until one is left.
Steps
- Start on the side where the working yarn is attached.
- Pull the working yarn through the first two loops of the last row at once. One loop is now on your hand.
- Keep your fingers inside that loop and reach for the next single loop on the row.
- Pull the next blanket loop through the loop on your hand.
- Repeat across the row. A flat braided edge forms as you go.
- Stop when one loop is left on your hand.
Where it breaks
The usual failure is skipping a loop in the last row. That leaves an open loop on the back, and it can unravel the piece later. I count loops aloud as I pull through, because you lose one easily when the yarn is this thick.
The second failure is pulling each loop snug as you go. It feels neat, and it ruins the width.
Work loose. The large yarn blanket chunky crochet ideas use the same loose rule at every edge, and a hook pattern like Tartan Crochet Blanket Pattern needs no closing row at all.
2. Make the closing loops at least as big as the working loops
The closing loops set the width of the top edge, so make them a size on purpose, never smaller than the loops you worked in. Two to three fingers wide (about 1.5 to 2 inches, 4 to 5 cm) is the minimum. A loop of about 3 inches (7 to 8 cm), three or four fingers, is the safe margin if your edge has pulled in before.
Steps
- Before the first pull, make a test loop and slide three fingers through it.
- If three fingers pass through freely, the loop is the right size to start with.
- Make every loop in the row to that same size.
- After ten loops, stop and check the first and the last against each other.
- Check the width of the closed part against the row below.
Where it breaks
Loops that are too big leave a hole in the edge. Your loops should be large, but not so large that the braid opens.
Tight loops warp the top into a triangle instead of a rectangle. Keep the working yarn straight between your hands.
For the knit version of this size check, large knitted blanket ideas and the yarn each takes has the sums. A written file such as Sundae Snuggle Crochet Blanket Pattern lists the sizes for you.
3. Weave the tail through the braided edge instead of tying a knot
After the last loop, you do not tie anything. You pull the tail through the final loop and weave it back and forth through the braided top edge on the back of the blanket. Never cut it flush.
The braid is thick, and a tail threaded through it holds by friction along its whole length. A knot holds at one point, and on chunky yarn it makes a lump.
Steps
- Cut the yarn from the ball and leave a tail of 12 inches.
- Pull the cut end through the last loop on your hand and draw it snug.
- Turn the blanket to the back.
- Thread the tail through the braids of the top edge, out and back, along the row.
- Trim what is left and tuck the end into the braid.
Where it breaks
Tail advice varies from 5 to 12 inches. A tail shorter than about 6 inches is hard to weave in and may pop out later, so I leave the long end.
A tail woven only once pulls loose. Go out and back. For a hook piece, crochet blanket borders that stop the ruffling use the same weave, and Double Waffle Crochet Baby Blanket ends with one end tail to weave.
Pro tip: Weave the tail the way the braid runs, not across it.
4. Hide the starting tail the same way
The yarn tail at the bottom of the blanket is hidden by the same weave. It is easy to forget, because the first row feels like a long time ago. A loose starting tail unravels from the other end of the blanket, so give it the same attention.
Steps
- Turn the blanket to the back and find the starting tail at the bottom corner.
- If it is shorter than about 6 inches, do not weave it; fix it with a few stitches of matching thread instead.
- If it is long enough, thread the tail along the braided cast-on edge, out and back.
- Pull gently and check the front. Nothing should show.
- Trim the end and tuck it in.
Where it breaks
A very short starting tail may have to be left alone and anchored with a few stitches of matching thread. That is better than a knot.
If you make a matching cushion from the offcuts, chunky knit pillow ideas and the yarn each takes show how much yarn a small piece takes. For a baby-size blanket, Mikeisha’s Baby Blanket is worked to a small size.
5. Fuse the tail on synthetic chenille, and only there
On polyester chenille jumbo yarn, you can fuse the tip of the tail with a lighter. The fibre melts and sticks to the loop beside it, so the end cannot pull out.
This works only on synthetic fibre.
Steps
- Weave the tail through the back of the border first.
- Cut it so only a tiny stub shows.
- Test the lighter on a scrap of the same yarn first.
- Singe the very edge of the fluff for a brief second, until it starts to melt.
- Press the melted end down into an adjacent inner loop with a tool or the side of the lighter, not your fingers.
Where it breaks
The failure is heat held too long. A second is the limit, and the scrap test tells you how fast your yarn reacts. Keep the flame away from the front of the blanket and work on a hard surface.
I fuse only chenille, and only the stub left after weaving. Wool and cotton get the weave and nothing more. Synthetic blanket yarns are covered in Bernat chunky blanket ideas, and a hook pattern like Tartan Crochet Blanket Pattern needs no fusing step.
Pro tip: Keep a cup of water within reach whenever a flame is near yarn.
6. Count the links on the top edge against the foundation row
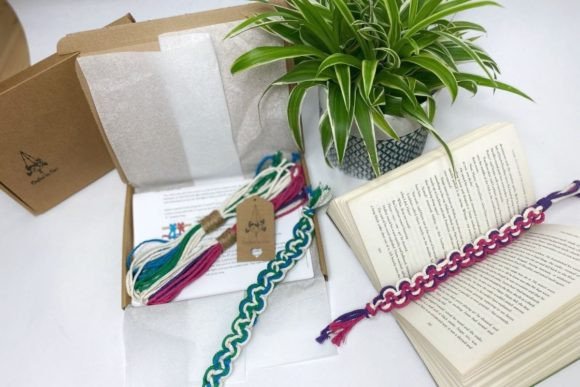
When the blanket is closed, count the braided links along the top. The number must match the number of loops in your foundation row, the cast-on. If you started with 18 loops, you should count 18 links.
This is the cheapest check there is. It takes a minute, and it catches the skipped loop before the blanket goes to a bed.
Steps
- Lay the finished blanket flat on a floor or a big table.
- Find the foundation row count, the number you wrote on your scrap of paper.
- Run a finger along the top edge and count the braided links.
- Compare the two numbers.
- If they differ, find the place where a link is missing.
Where it breaks
A count that comes out one short means a skipped loop, and that leaves an open loop on the back. Any other count means you should recheck the row. Both are easy to fix while the yarn is still loose.
For a stitch count on a hook blanket, ways to crochet a throw blanket in yards gives the sums, and Sundae Snuggle Crochet Blanket Pattern is a pattern with a written size.
Pro tip: Count twice, once from each end.
7. Fix a gap in the edge when the closing loops came out too big
If the closing loops were too big, the braid can leave a hole in the edge. The fix is to undo back to the gap and close those loops again at the right size.
Steps
- Find the gap and count how many loops sit between it and the end you closed from.
- Undo the closing loops back to just before the gap, one at a time.
- Each undone loop gives you the original loop back on the row.
- Redo the loops from that point with a finger-width smaller loop.
- Check the width of the closed stretch against the row below.
Where it breaks
Undoing too fast drops loops. Pull one free, pause, and confirm the next loop is still on the row before you pull again. I put a clip on the last good loop so I do not lose my place.
To avoid the redo, a pattern such as Double Waffle Crochet Baby Blanket sets the size first.
8. Join a new strand without a knot when the yarn ran out
You can still run out of yarn mid-row, even with a good sum. The fix is to join a new strand without a knot and carry on, so the closing row stays flat.
A knot in the middle of a braided edge shows from the front and catches on everything. A woven join lies inside the braid and disappears.
Steps
- Stop with a full loop on your hand and a short end of old yarn.
- Lay the end of the new yarn beside the old end.
- Close the next few loops with both ends held together as one.
- Let the old end drop to the back and keep going with the new.
- When the row is done, weave both ends into the braid on the back.
Where it breaks
Joining on a corner loop is the weak point, because that loop takes the most strain. Join in the middle of the row, where the braid holds each end from both sides; the middle of a row is acceptable for a join, a corner is not.
To buy the yarn with the sum in hand, see chunky C2C crochet blanket ideas, and Tartan Crochet Blanket Pattern has you fasten off instead.
9. Close a tube or raw-edged yarn with thread instead of a lump
Some chunky yarn is a flat strip or tube of fabric with a raw, fraying edge. If you only tuck the tail in, it can shed. Secure the raw tip to the back of the blanket with a needle and thread.
Steps
- Weave the tail through the back of the braided edge as in idea 3.
- Trim it so the raw tip lies flat.
- Thread a needle with thread close to the colour of the yarn.
- Stitch the raw tip down to an adjacent stitch on the back.
- Take two or three small stitches and finish the thread inside the braid.
Where it breaks
Thread that is too thin cuts through soft yarn. Sew into the thickest part of the loop, not the fluff.
A hook blanket such as Sundae Snuggle Crochet Blanket Pattern, with yarn that is not raw-edged, avoids this job. Plaid and gingham C2C crochet blanket ideas show where more ends appear.
10. Run the flop test before you call the blanket finished
The flop test is a check you do with your hands. Pick up the blanket by its finished edge. Does the top pinch tightly together, or does it flare like a ruffle? It should hang straight and match the width of the bottom edge.
Steps
- Lift the blanket by the middle of the top edge and let it hang.
- Look at the top edge against the bottom edge.
- Lay it flat and measure both ends.
- If the top is narrower, open the closing loops back to the pinch and redo them wider.
- If the top ruffles, redo those loops smaller.
Where it breaks
You will not want to undo a woven tail, so run the test before you weave the tails (idea 3).
See C2C waffle stitch crochet blanket for textured stitch ideas, or Double Waffle Crochet Baby Blanket for a printed size.
Pro tip: Run the test in daylight. A pinch hides in dim light.
11. End a chunky crochet blanket without a knot: fasten off and weave in
A crochet blanket, or a blanket from yarn with ready-made loops, needs a different finish than loop through loop. There is no row of live loops to close. You work the last stitch, fasten off, and weave in a long tail.
You still end without a knot. The tail goes under the stitches along the edge, out and back, the same way as idea 3.
Steps
- Work the last stitch of the last row.
- Cut the yarn and leave a long tail.
- Pull the cut end all the way through the loop on your hook.
- Weave the tail under the stitches along the edge, out and back.
- Trim the end and tuck it in.
Where it breaks
In crochet, a starting chain can tighten the edge, so use a hook 0.5 to 1 mm larger for the chain. Ideas for stitch patterns are in C2C crochet blanket ideas and crochet C2C moss stitch blanket.
A written pattern that prints the finished size saves you the sums above. The four I would look at are below, and each one is a hook blanket, so none of them needs the loop closing from idea 1.
- Double Waffle Crochet Baby Blanket: a textured baby blanket, so it suits a small, quick project. It is not the one for a 60 inch throw.
- Mikeisha’s Baby Blanket: a baby blanket pattern, so a lap-size piece. It suits a first hook project and not a large bed throw.
- Sundae Snuggle Crochet Blanket Pattern: an easy crochet blanket. It suits you when you want a plain, cosy throw and few ends to weave in.
- Tartan Crochet Blanket Pattern: a plaid look means colour changes, and colour changes mean more ends to weave in. Skip it if you hate weaving.
| Option | How the end is made | Ends to weave | My verdict |
|---|---|---|---|
| Loop through loop (hand knit) | Bind off, tail through last loop | Two tails | Best for a plain chunky throw |
| Fasten off (crochet) | Cut, pull through, weave | Two tails (start and end) plus any joins | Best when you hold a hook |
| Tartan pattern in crochet | Fasten off at each colour change | Many | Worth it only if you like weaving |
If it goes wrong: a puckered top, a ruffled top, a dropped loop
- A puckered top: the closing loops were too tight. Undo back to the pinch and redo them at least two to three fingers wide (three to four to be safe), as in idea 2.
- A ruffled top: the loops were too loose. Redo that stretch smaller until the edge matches the bottom width.
- A dropped loop: look at the back under the border. Sew the loose loop to the next stitch with matching thread.
- A gap in the edge: the closing loops came out too big. Undo to the gap and redo, as in idea 7.
- A tail that pops out: it was too short or woven only once. Weave it again, out and back.
If the edge fails the flop test in idea 10, you redo the loops, you do not pull on them. A fastened-off pattern like Sundae Snuggle Crochet Blanket Pattern avoids the whole closing row.

Key takeaways
- Leave about four blanket widths of yarn plus 12 inches before the last row, or the yarn runs out mid-row.
- Close loop through loop with loose loops, two to three fingers wide (1.5 to 2 inches, 4 to 5 cm).
- Tight closing loops cinch the top edge and curl it into a triangle.
- Weave the tail back and forth through the braided edge. Never cut it flush.
- Count the links on the top edge against the loops of the foundation row.
- A crochet blanket is fastened off, not closed loop through loop.
Common questions
How to finish a chunky blanket?
You cast off a chunky blanket on the final row to lock the loops, secure the working yarn, and weave the loose tail into the braided edge so it cannot unravel. Pull each loop through the next, keep the loops loose, and cut a tail of about 12 inches.
How to end a chunky blanket?
Pull the working yarn through the first two loops of the last row, then take each next loop through the loop on your hand. When one loop is left, pull the tail through it and weave the tail into the edge.
How to finish a chunky blanket for beginners?
Leave about four widths of yarn, close loop through loop with loops two to three fingers wide, and weave the tail into the braid. Then count the links against your foundation row. A pattern like Sundae Snuggle Crochet Blanket Pattern is an easy hook option.
How much yarn do I need to end a chunky blanket?
About four times the blanket width plus 12 inches of tail. That is 156 inches for 36 inches wide, 204 for 48 and 252 for 60.
How to end a chunky blanket without a knot?
Pull the tail through the last loop and weave it back and forth through the braided top edge on the back. The weave holds by friction along its length, so no knot is needed.
How to end a chunky crochet blanket?
You fasten off: work the last stitch, cut the yarn, pull the end through the loop and weave in the tail. Patterns such as Tartan Crochet Blanket Pattern need more tails to weave because of colour changes.
Why does the top of my chunky blanket pull in?
The closing loops were too small, so each one drew its neighbours inward. Redo them taller and looser.
How to stop a knit blanket from shedding?
Weave the tail through several stitches on the back. On a raw-edged yarn, stitch the tip down with a needle and thread. On polyester chenille you can fuse the tip with a lighter for a second, after a test on a scrap.